I strive to keep my seasonal expressions in line with my day-to-day home decor. In other words, since I don't have pastels in my home, my spring decorating will lack pastels (unless it's a wreath for the door). I love using natural elements and taking inspiration from nature, which inspires my projects much of the time. That said, today, I'm sharing how I created my Spring Nest with Pyrographic Eggs.
 |
| Spring Decorating with Nature..twigs, raffia & wood |
Spring is all about the birds around our house. We have 3-4 bird houses and a couple of feeders so you can always see birds somewhere close by. This led to the idea of doing a nest with wood eggs embellished with the wood burning tool. I am still a beginner with the wood burner, truthfully, I'm still overcoming a mild fear since it's much hotter than a glue gun and we all know how that smarts! However, I must say I am tickled with the results and it's harmonious with my existing decor. I am placing my nest and eggs under the bell jar (cloche) I received at Christmas but it would be just as pretty sitting on a mantel or tabletop on its own.
Here's how I created my Spring Nest with Pyrographic Eggs. Obviously, you can make the same things without using a wood burner. Paints, inks, and stamping are options that would bring a similar look to your wood eggs.
 Supplies:
- twigs
- raffia
- Wood eggs
- Wood burner or paints, inks, and stamping supplies
- black paint
- hot glue
- scissors
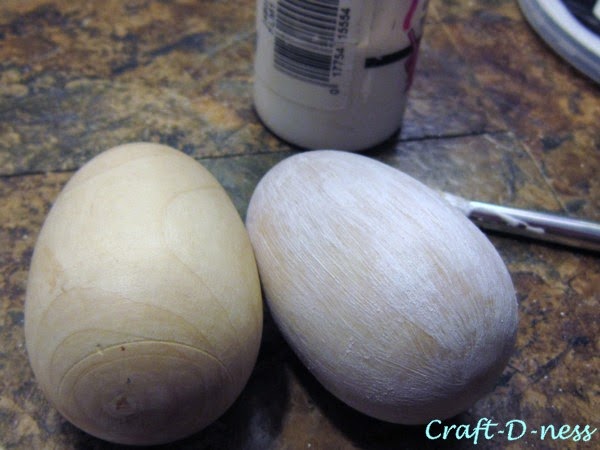
First, I painted the wood eggs white. I did one coat and wasn't overly concerned with coverage. I simply didn't want the color of the plain wood.
Then I found twigs that would fit under my bell jar and allow for a nest in the branches. I worked two branches together until I could get them to stand as a unit then I hot glued the joints just to make sure when I added the nest and eggs they wouldn't collapse.
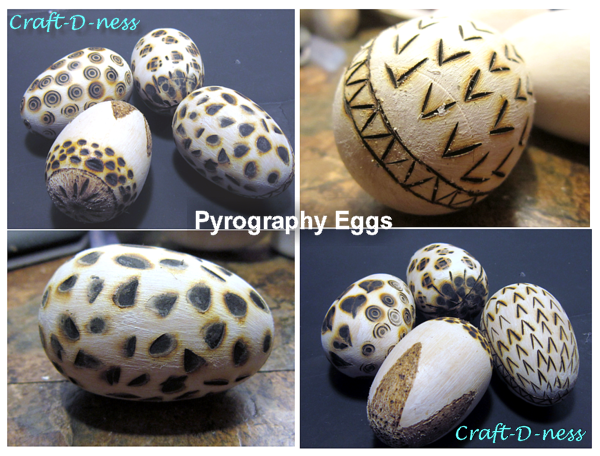
My next step was adorning the eggs. I had no real plan or pattern. I just used the existing wood burner tips I have to do the work. In a few instances, I used the tips to create icons like hearts, zig-zags and flowers. If you decide you want to pursue pyrography check out my tips and cautions to help get you started. Each side of each egg has a different pattern. I wanted to practice with the burner so now I have a bunch of different looks just by turning the eggs over!
Once I had the eggs decorated, I built the nest. I took an empty box and cut out a circle and painted it black. This will be the base of the nest where I can attach raffia using hot glue and it is the resting place for the wood eggs. I took a handful of the raffia tied it on each end and wound it around on itself and hot glued it to create a fairly tight circle. I attached the raffia to the cardboard using hot glue. I trimmed and glued until I got the shape and appearance I wanted.
I didn't like the starkness of the raffia (it just didn't look natural) so I dry brushed some black paint on it to tone it down some.
Finally, I placed the nest in the twig branches and added the eggs to the nest. Unfortunately, I could only fit 3 of the 4 eggs I had decorated but as with all decorating learning to edit is essential so I went with 3 eggs.
It is hard to get good pictures through a glass jar but I took a few to give the full effect.
Do you do seasonal decorating? How do you decide materials, colors? What inspires you? I'd love to know!

I'm sharing at these great parties - Creative Juice, Be Different...Act Normal, The Shabby Nest, SITSGirls,
One More Time Events, All Things Fee, Lolly Jane, Artsy Fartsy Mama, Follow Craft-D-ness
If you prefer, you may want to subscribe via Email:


No comments:
Post a Comment